Internet Protocol Suite
From Wikipedia, the free encyclopedia
The Internet Protocol Suite (commonly known as TCP/IP) is the set of communications protocolsInternet and other similar networks. It is named from two of the most important protocols in it: the Transmission Control Protocol (TCP) and the Internet Protocol (IP), which were the first two networking protocols defined in this standard. Today's IP networking represents a synthesis of several developments that began to evolve in the 1960s and 1970s, namely the Internet and LANs (Local Area Networks), which emerged in the mid- to late-1980s, together with the advent of the World Wide Web in the early 1990s. used for the
The Internet Protocol Suite, like many protocol suites, may be viewed as a set of layers. Each layer solves a set of problems involving the transmission of data, and provides a well-defined service to the upper layer protocols based on using services from some lower layers. Upper layers are logically closer to the user and deal with more abstract data, relying on lower layer protocols to translate data into forms that can eventually be physically transmitted.
The TCP/IP model consists of four layers (RFC 1122).[1][2] From lowest to highest, these are the Link Layer, the Internet Layer, the Transport Layer, and the Application Layer.
| The Internet Protocol Suite | |
| Application Layer | |
|---|---|
| BGP · DHCP · DNS · FTP · GTP · HTTP ·IMAP · IRC · Megaco · MGCP · NNTP · NTP ·POP · RIP · RPC · RTP · RTSP · SDP ·SIP · SMTP · SNMP · SOAP · SSH · STUN ·Telnet · TLS/SSL · XMPP · (more) | |
| Transport Layer | |
| TCP · UDP · DCCP · SCTP · RSVP · ECN ·(more) | |
| Internet Layer | |
| IP (IPv4, IPv6) · ICMP · ICMPv6 · IGMP ·IPsec · (more) | |
| Link Layer | |
| ARP · RARP · NDP · OSPF ·Tunnels (L2TP) · Media Access Control (Ethernet, MPLS, DSL, ISDN, FDDI) · Device Drivers · (more) | |
Contents[hide] |
[edit] History
The Internet Protocol Suite resulted from work done by Defense Advanced Research Projects Agency (DARPA) in the early 1970s. After building the pioneering ARPANET in 1969, DARPA started work on a number of other data transmission technologies. In 1972, Robert E. Kahn was hired at the DARPA Information Processing Technology Office, where he worked on both satellite packet networks and ground-based radio packet networks, and recognized the value of being able to communicate across them. In the spring of 1973, Vinton Cerf, the developer of the existing ARPANET Network Control Program (NCP) protocol, joined Kahn to work on open-architecture interconnection models with the goal of designing the next protocol generation for the ARPANET.
By the summer of 1973, Kahn and Cerf had worked out a fundamental reformulation, where the differences between network protocols were hidden by using a common internetwork protocol, and, instead of the network being responsible for reliability, as in the ARPANET, the hosts became responsible. Cerf credits Hubert Zimmerman and Louis Pouzin, designer of the CYCLADES network, with important influences on this design.
With the role of the network reduced to the bare minimum, it became possible to join almost any networks together, no matter what their characteristics were, thereby solving Kahn's initial problem. One popular saying has it that TCP/IP, the eventual product of Cerf and Kahn's work, will run over "two tin cans and a string." There is even an implementation designed to run using homing pigeons, IP over Avian Carriers, documented in RFC 1149.[3][4]
A computer called a router (a name changed from gateway to avoid confusion with other types of gateways) is provided with an interface to each network, and forwards packets back and forth between them. Requirements for routers are defined in (Request for Comments 1812).[5]
The idea was worked out in more detailed form by Cerf's networking research group at Stanford in the 1973–74 period, resulting in the first TCP specification (Request for Comments 675) [6]. (The early networking work at Xerox PARC, which produced the PARC Universal Packet protocol suite, much of which existed around the same period of time, was also a significant technical influence; people moved between the two.)
DARPA then contracted with BBN Technologies, Stanford University, and the University College London to develop operational versions of the protocol on different hardware platforms. Four versions were developed: TCP v1, TCP v2, a split into TCP v3 and IP v3 in the spring of 1978, and then stability with TCP/IP v4 — the standard protocol still in use on the Internet today.
In 1975, a two-network TCP/IP communications test was performed between Stanford and University College London (UCL). In November, 1977, a three-network TCP/IP test was conducted between sites in the US, UK, and Norway. Several other TCP/IP prototypes were developed at multiple research centers between 1978 and 1983. The migration of the ARPANET to TCP/IP was officially completed on January 1, 1983 when the new protocols were permanently activated.[7]
In March 1982, the US Department of Defense declared TCP/IP as the standard for all military computer networking.[8] In 1985, the Internet Architecture Board held a three day workshop on TCP/IP for the computer industry, attended by 250 vendor representatives, promoting the protocol and leading to its increasing commercial use.
Kahn and Cerf were honored with the Presidential Medal of Freedom on November 9, 2005 for their contribution to American culture.
[edit] Layers in the Internet Protocol Suite
[edit] The concept of layers
The TCP/IP suite uses encapsulation to provide abstraction of protocols and services. Such encapsulation usually is aligned with the division of the protocol suite into layers of general functionality. In general, an application (the highest level of the model) uses a set of protocols to send its data down the layers, being further encapsulated at each level.
This may be illustrated by an example network scenario, in which two Internet host computers communicate across local network boundaries constituted by their internetworking gateways (routers).
 |  |
The functional groups of protocols and methods are the Application Layer, the Transport Layer, the Internet Layer, and the Link Layer (RFC 1122). It should be noted that this model was not intended to be a rigid reference model into which new protocols have to fit in order to be accepted as a standard.
The following table provides some examples of the protocols grouped in their respective layers.
| Application | DNS, TFTP, TLS/SSL, FTP, Gopher, HTTP, IMAP, IRC, NNTP, POP3, SIP, SMTP,SMPP, SNMP, SSH, Telnet, Echo, RTP, PNRP, rlogin, ENRP |
|---|---|
| Routing protocols like BGP and RIP which run over TCP/UDP, may also be considered part of the Internet Layer. | |
| Transport | TCP, UDP, DCCP, SCTP, IL, RUDP, RSVP |
| Internet | IP (IPv4, IPv6) ICMP, IGMP, and ICMPv6 |
| OSPF for IPv4 was initially considered IP layer protocol since it runs per IP-subnet, but has been placed on the Link since RFC 2740. | |
| Link | ARP, RARP, OSPF (IPv4/IPv6), IS-IS, NDP |
[edit] Layer names and number of layers in the literature
The following table shows the layer names and the number of layers in the TCP/IP model as presented in widespread university course textbooks on computer networking used today.
| Forouzan [9], RFC 1188, RFC 1377, RFC 1663 | Comer[10], Kozierok[11] | Stallings[12] | Tanenbaum[13] | Kurose[14], RFC 1122 | Cisco Academy[15] | Arpanet Reference Model 1982 (RFC 871) | |
|---|---|---|---|---|---|---|---|
| Five layers | Five layers | Five layers | Four layers | Four layers | Four layers | Three layers | |
| L5 | Application | Application | Application | Application | Application | Application | Application/Process |
| L4 | Transport | Transport | Host-to-host or transport | Transport | Transport | Transport | Host-to-host |
| L3 | Network | Internet | Internet | Internet | Internet | Internetwork | |
| L2 | Data link | Data link (Network interface) | Network access | Host-to-network | Link | Network interface | Network interface |
| L1 | Physical | (Hardware) | Physical |
These textbooks are secondary sources that may contravene the intent of RFC 1122 and other IETF primary sources[16].
Different authors have interpreted the RFCs differently regarding whether the Link Layer (and the four-layer TCP/IP model) covers physical layer issues or a "hardware layer" is assumed below the link layer. Some authors have tried to use other names for the Link Layer, such as Network interface layer, in effort to avoid confusion with the Data Link Layer of the seven-layer OSI model. Others have attempted to map the Internet Protocol model onto the seven-layer OSI Model. The mapping often results in a five-layer TCP/IP model, wherein the Link Layer is split into a Data Link Layer on top of a Physical Layer. Especially in literature with a bottom-up approach to computer networking, where physical layer issues are emphasized, an evolution towards a five-layer Internet model can be observed out of pedagogical reasons.
The Internet Layer is usually directly mapped to the OSI's Network Layer. At the top of the hierarchy, the Transport Layer is always mapped directly into OSI Layer 4 of the same name. OSIs Application Layer, Presentation Layer, and Session Layer are collapsed into TCP/IP's Application Layer. As a result, these efforts result in either a four- or five-layer scheme with a variety of layer names. This has caused considerable confusion in the application of these models. Other authors dispense with rigid pedagogy[17] focusing instead on functionality and behavior.
The Internet protocol stack has never been altered by the Internet Engineering Task Force (IETF) from the four layers defined in RFC 1122. The IETF makes no effort to follow the seven-layer OSI model and does not refer to it in standards-track protocol specifications and other architectural documents. The IETF has repeatedly stated that Internet protocol and architecture development is not intended to be OSI-compliant.
RFC 3439, addressing Internet architecture, contains a section entitled: "Layering Considered Harmful".[16]
[
To install Windows 7 on your Mac using Boot Camp you will need the following:
- All firmware updates installed on your Mac (use Apple Button -> Software Update… to check)
- A Windows 7 installation DVD
- Your OS X Leopard installation DVD
- At least 10GB of empty
hard drive space on your Mac (you can probably get away with less but you’ll have almost no room to install anything other than the OS) - An hour if all goes well, up to 5 hours if not
- Though not absolutely required, it’s a VERY good idea to have a complete and up to date Time Machine
backup of OS X - it really came in handy for me. Because part of the process involves partitioning yourdrive , there’s always the distinct chance something will go wrong and everything will be wiped out. - Patience, possibly a great deal of it. Having a book handy will also help kill time during the partitioning, installing etc).
Installing Windows 7 via Boot Camp
- Here goes. First thing - close absolutely every open
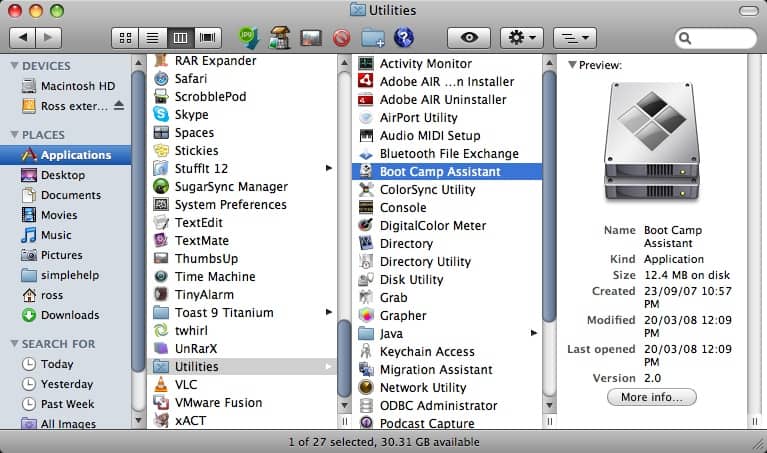
program you can. That includes those things running in the Apple Menu that you always forget about. Don’t worry about killing the Dock or Dashboard - having those running is fine. - Now open a Finder and navigate to Applications -> Utilities and double-click Boot Camp Assistant.
- Click Continue on the initial Introduction screen. Ignore the fact that it doesn’t mention Windows 7 as a possible OS to install.
- Now you have to decide how much space you want to allocate to Windows 7. You might be able to get away with going as low as 6GB, but I would highly advise against it. You’ll have almost no space left over to install software, and your page file in Windows might cause frequent crashes. I opted for 20GB, which left me with just a bit over 16GB to use after installing Windows 7.
To change the amount of space to dedicate to Windows 7, click the small divider between Mac OS X and Windows, and drag it to the left.
- Once you’ve determined how much space you want to allocate to Windows 7, click the Partition button.
- The partitioning itself doesn’t take particularly long. If you receive an error, proceed to step 10 of the “How to install Vista with Boot Camp” tutorial. It provides all the troubleshooting info you need to resolve partitioning issues. Once you’ve cleared up any problems, or if everything just goes smoothly, proceed with the next step in this tutorial.
- Once completed you’ll notice a new BOOTCAMP drive on your desktop.
- Now insert your Windows 7 DVD and click the Start Installation button.
- Your Mac will restart, and Windows 7 will boot. You’ll be prompted with a window asking you which partition you want to install Windows on. Select the one with BOOTCAMP in the Name column. Selecting anything else may wipe out OS X or cause serious problems. Then select the Drive options (advanced) link.
- With the BOOTCAMP volume still selected, click the Format link.
- Click OK.
- And Windows 7 will begin to install. It’s a fairly boring process, so you may want to grab yourself a cup of coffee or your beverage of choice. But don’t go too far away, because when your system reboots, you’ll need to remove the Windows 7 DVD.
- With the Windows 7 DVD removed, your Mac will automatically boot back into Windows 7, and the installation will complete. You’ll be prompted to select your language, keyboard layout etc. The rest of the Windows 7 installation process is very straight forward.
- Once the installation has completed and your Mac has restarted again, you’ll be able to use Windows 7. WiFi will work immediately (no drivers to install) so connect to the Internet. Windows 7 will then begin to download updates, including the proper video card driver. Let it do its thing.
- Once completed, you’ll be prompted to reboot yet again. Do so.
- Once Windows 7 boots back up again, you’ll notice the resolution is much better, and you can enable the advanced graphics features.
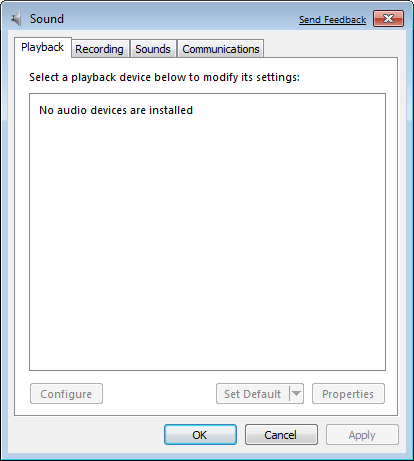
- But if you check for sound, you’ll notice there are no sound drivers installed.
- Insert your OS X Leopard DVD. When prompted, select Run setup.exe.
- The Boot Camp installer will launch. Click Next to begin.
- Select I accept the terms in the license agreement and then click Next again.
- Make sure that Apple Software Update for Windows is checked, and click Install.
- The Boot Camp installer will do its thing, and install all the required drivers.
- Notifications will pop up with each driver that gets installed.
- Once completed, click Finish.
- And yet again you’ll be prompted to reboot. Remove your OS X Leopard DVD from the drive, and click Yes to restart.
- If you still have problems with sound not working, you’ll need to install the Realtek drivers. This tutorial will explain what to do.
- That’s it, you’re done! When your Mac boots, hold down the Option key to select which Operating System you want to boot into.


How to Install Windows Server 2008 Step by Step
Installing Windows Server 2008 is pretty straightforward and is very much like installing Windows Vista, but I thought I'd list the necessary steps here for additional information. For those of you who have never installed Vista before, the entire installation process is different than it used to be in previous Microsoft operating systems, and notably much easier to perform.

Have you seen the Network Infrastructure 70-642 Training video by Train Signal? I highly recommend this course, as you will learn much more than you will from any book. Train Signal's package includes new iPod/MP3 versions of the course (for learning on the go) and Transcender practice tests to help you prepare for certification. The instructors, Ed and Coach, do an amazing job not only preparing you to get Microsoft Certified but also showing you what tasks you need to perform on real Windows 2008 Servers, in the real world!
Watch Free Demo Video of this Course Here!Using Vista's installation routine is a major benefit, especially for a server OS. Administrators can partition the system's hard drives during setup. More importantly, they can install the necessary AHCI or RAID storage drivers from a CD/DVD or even a USB thumb drive. Thus, error-prone floppies can finally be sent to the garbage bin.
Note: Windows Server 2008 can also be installed as a Server Core installation, which is a cut-down version of Windows without the Windows Explorer GUI. Because you don’t have the Windows Explorer to provide the GUI interface that you are used to, you configure everything through the command line interface or remotely using a Microsoft Management Console (MMC). The Server Core can be used for dedicated machines with basic roles such as Domain controller/Active Directory Domain Services, DNS Server, DHCP Server, file server, print server, Windows Media Server, IIS 7 web server and Windows Server Virtualization virtual server. For Server Core installations please see my "Installing Windows Server 2008 Core" article.
To use Windows Server 2008 you need to meet the following hardware requirements:
| Component | Requirement |
| Processor | • Minimum: 1GHz (x86 processor) or 1.4GHz (x64 processor) • Recommended: 2GHz or faster Note: An Intel Itanium 2 processor is required for Windows Server 2008 for Itanium-based Systems |
| Memory | • Minimum: 512MB RAM • Recommended: 2GB RAM or greater • Maximum (32-bit systems): 4GB (Standard) or 64GB (Enterprise and Datacenter) • Maximum (64-bit systems): 32GB (Standard) or 2TB (Enterprise, Datacenter and Itanium-based Systems) |
| Available Disk Space | • Minimum: 10GB • Recommended: 40GB or greater Note: Computers with more than 16GB of RAM will require more disk space for paging, hibernation, and dump files |
| Drive | DVD-ROM drive |
| Display and Peripherals | • Super VGA (800 x 600) or higher-resolution monitor • Keyboard • Microsoft Mouse or compatible pointing device |
Upgrade notes:
I will not discuss the upgrade process in this article, but for your general knowledge, the upgrade paths available for Windows Server 2008 shown in the table below:
| If you are currently running: | You can upgrade to: |
| Windows Server 2003 Standard Edition (R2, Service Pack 1 or Service Pack 2) | Full Installation of Windows Server 2008 Standard Edition Full Installation of Windows Server 2008 Enterprise Edition
|
| Windows Server 2003 Enterprise Edition (R2, Service Pack 1 or Service Pack 2) | Full Installation of Windows Server 2008 Enterprise Edition
|
| Windows Server 2003 Datacenter Edition (R2, Service Pack 1 or Service Pack 2) | Full Installation of Windows Server 2008 Datacenter Edition
|
Follow this procedure to install Windows Server 2008:
1. Insert the appropriate Windows Server 2008 installation media into your DVD drive. If you don't have an installation DVD for Windows Server 2008, you can download one for free from Microsoft's Windows 2008 Server Trial website.
2. Reboot the computer.

3. When prompted for an installation language and other regional options, make your selection and press Next.

4. Next, press Install Now to begin the installation process.

5. Product activation is now also identical with that found in Windows Vista. Enter your Product ID in the next window, and if you want to automatically activate Windows the moment the installation finishes, click Next.

If you do not have the Product ID available right now, you can leave the box empty, and click Next. You will need to provide the Product ID later, after the server installation is over. Press No.

6. Because you did not provide the correct ID, the installation process cannot determine what kind of Windows Server 2008 license you own, and therefore you will be prompted to select your correct version in the next screen, assuming you are telling the truth and will provide the correct ID to prove your selection later on.

7. If you did provide the right Product ID, select the Full version of the right Windows version you're prompted, and click Next.

8. Read and accept the license terms by clicking to select the checkbox and pressing Next.

9. In the "Which type of installation do you want?" window, click the only available option – Custom (Advanced).

10. In the "Where do you want to install Windows?", if you're installing the server on a regular IDE hard disk, click to select the first disk, usually Disk 0, and click Next.

If you're installing on a hard disk that's connected to a SCSI controller, click Load Driver and insert the media provided by the controller's manufacturer.
If you're installing in a Virtual Machine environment, make sure you read the "Installing the Virtual SCSI Controller Driver for Virtual Server 2005 on Windows Server 2008"
If you must, you can also click Drive Options and manually create a partition on the destination hard disk.
11. The installation now begins, and you can go and have lunch. Copying the setup files from the DVD to the hard drive only takes about one minute. However, extracting and uncompressing the files takes a good deal longer. After 20 minutes, the operating system is installed. The exact time it takes to install server core depends upon your hardware specifications. Faster disks will perform much faster installs… Windows Server 2008 takes up approximately 10 GB of hard drive space.

The installation process will reboot your computer, so, if in step #10 you inserted a floppy disk (either real or virtual), make sure you remove it before going to lunch, as you'll find the server hanged without the ability to boot (you can bypass this by configuring the server to boot from a CD/DVD and then from the hard disk in the booting order on the server's BIOS)
12. Then the server reboots you'll be prompted with the new Windows Server 2008 type of login screen. Press CTRL+ALT+DEL to log in.

13. Click on Other User.

14. The default Administrator is blank, so just type Administrator and press Enter.

15. You will be prompted to change the user's password. You have no choice but to press Ok.

16. In the password changing dialog box, leave the default password blank (duh, read step #15…), and enter a new, complex, at-least-7-characters-long new password twice. A password like "topsecret" is not valid (it's not complex), but one like "T0pSecreT!" sure is. Make sure you remember it.
17. Someone thought it would be cool to nag you once more, so now you'll be prompted to accept the fact that the password had been changed. Press Ok.


18. Finally, the desktop appears and that's it, you're logged on and can begin working. You will be greeted by an assistant for the initial server configuration, and after performing some initial configuration tasks, you will be able to start working.
Next, for the initial configuration tasks please follow my other Windows Server 2008 articles found on the Related Windows Server 2008 Articles section below.
For Official Microsoft information on Windows Server 2008, see the Windows Server 2008 homepage.


